I have read several tutorials about how to make swifer duster cloths using microfiber cloths, and decided to make my own tutorial that is simpler and quick. Here is what you need:
- sewing machine
- 4 microfiber cloths *each duster is 4 cloths together* (I bought a pack of 10"x10" microfiber cloths; the final result is about 8"x8")
- thread (I used white, you can color coordinate your thread if you choose)
- scissors
- a ruler
- fabric pencil/marker
- Swifer duster handle (as a guideline)
Let's get started!
This is my 10"x10" microfiber cloth I bought at JoAnn's in a pack of three. First, cut the trim off. I did this because I didn't want the trim to scratch any surface I dust; however, you will cut off about an inch on the top and sides in the end. So, at least cut the bottom off where the swifer duster holder will come off.
Next, pin 2 of the cloths together and sew them together down the middle. Repeat with the other two pieces.
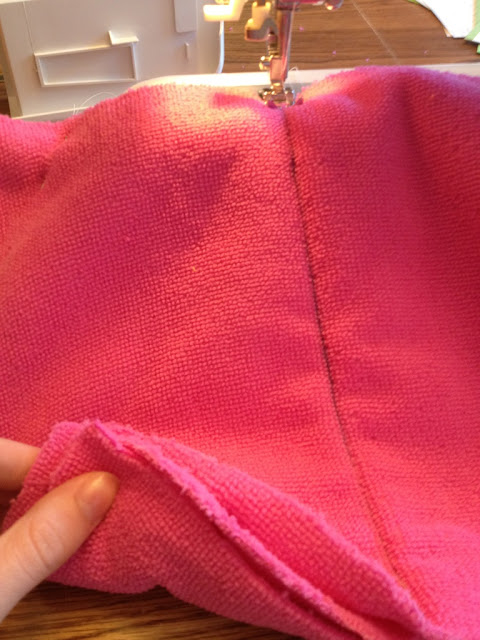
Now pin all 4 pieces together and sew down the middle.
Now that all 4 pieces are sewn together, lay them down and take the top piece of fabric and fold it over. *Like flipping a page on a book, you want to "read" the next piece of fabric.*
After "reading" your piece of fabric, lay down the swifer holder so the little middle piece and right piece are on the right side of the crease.
Now, use your ruler to mark where you will be sewing. You will be sewing through 3 pieces of the microfiber, leaving gaps where the two little parts of plastic come out.
Now, repeat these steps on the other side. *Go back to your original page- all 4 pieces flat, and go back one more page- 3 pieces of microfiber on the left, 5 on the right.*
Now put your "book" back to its original position. Next, I made my piece 8"x8" by cutting off excess fabric.
At one of the ends, I closed it off by about an inch on both sides of the middle seam. This way the fabric at the top won't curl over towards your hand, or fall off the swifer.
Finally, start cutting each microfiber piece. I tried to alternate the little "slices" for each piece. I go in roughly 3.5" or 4". And after that, shake it out, OUTSIDE since there will be a lot of loose pieces-cut microfiber is messy! Then I just wash it with my towels and there you go, your own swifer duster cloths!
I hope you enjoy your new dusters! I am a beginner sewer, and this was pretty easy! Please comment below if you have any questions!


No comments:
Post a Comment
What do you think?...